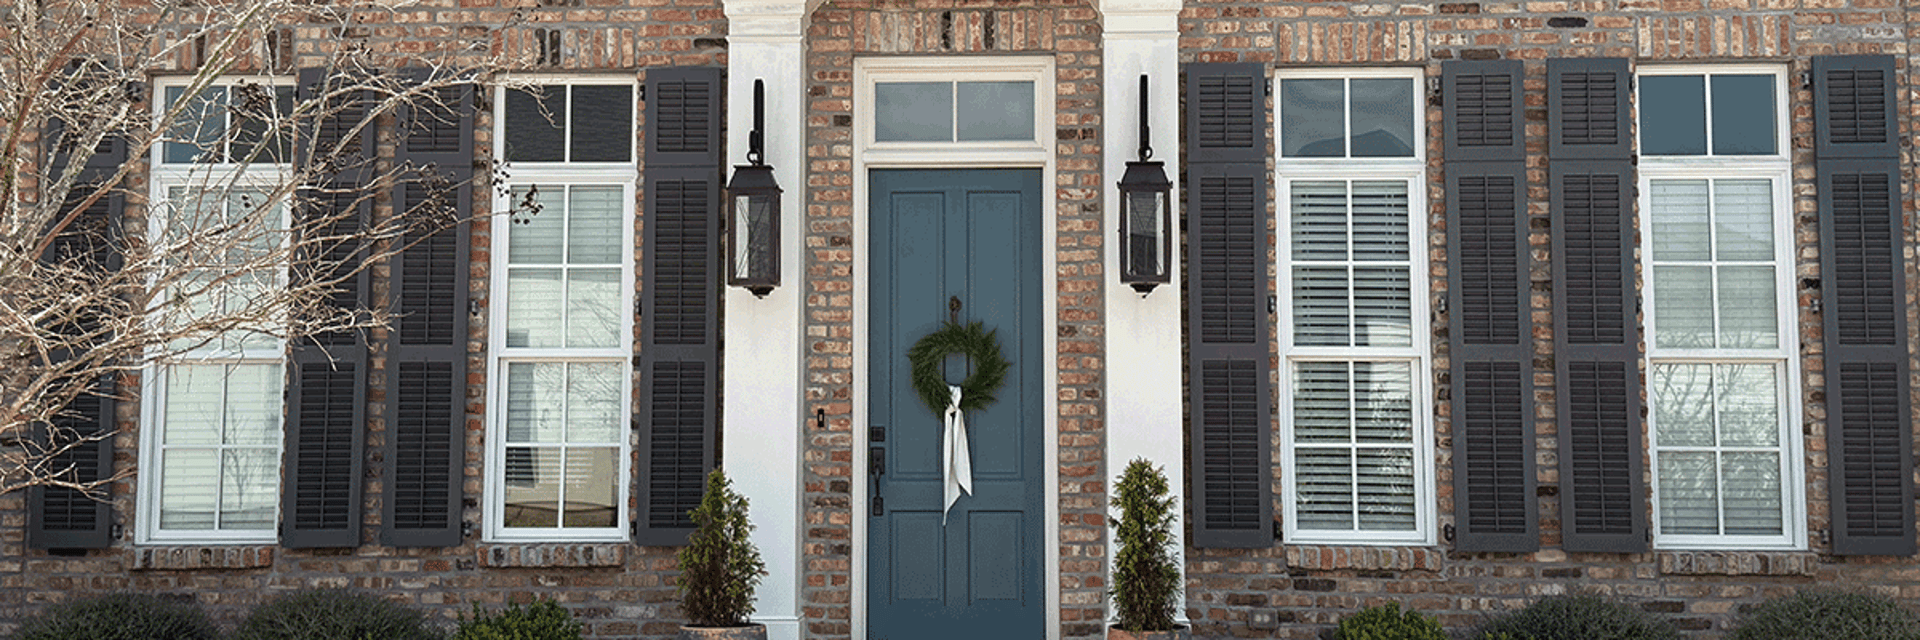
Luxury shutters at competitive prices!
BUILDING SHUTTERS THE AEGIS WAY

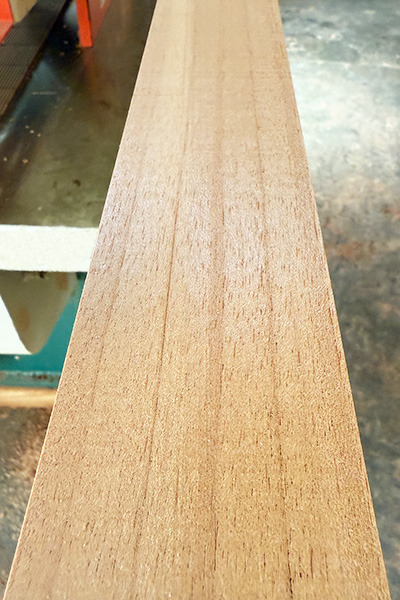
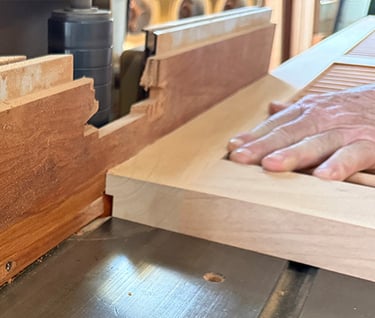
Step 1 - Wood Selection
We hand select each piece of kiln dried Spanish Cedar and inspect for any natural grain irregularities, then set aside each piece for framing, louvers, etc. Each piece of lumber undergoes rigorous examination where our skilled craftsmen carefully assess grain patterns, moisture content, and structural integrity before any cutting begins.
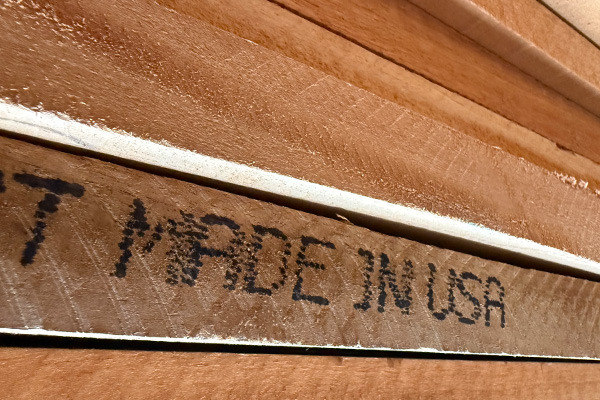
Spanish Cedar is not an actual Cedar, but is more closely related to true Mahoganies and has natural oils that make for a highly durable and rot resistant wood species. The Spanish Cedar that we use at Aegis Shutters is grown on tree farms with a focus on sustainable forestry practices. Each piece of lumber is kiln dried to improve quality and usability.
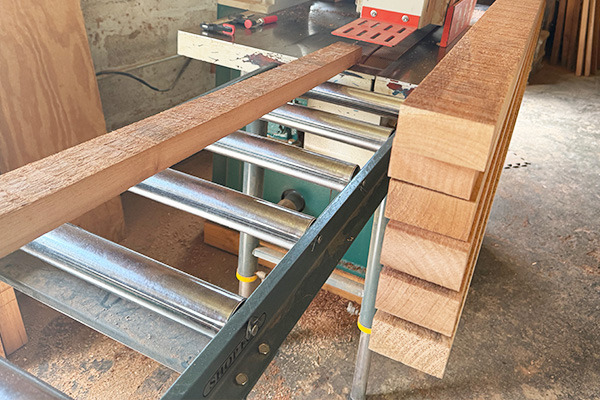
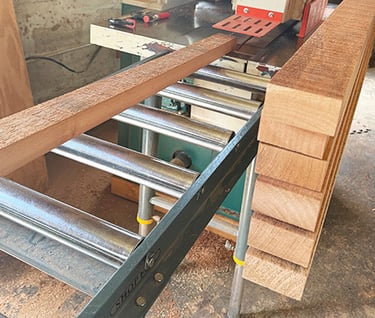
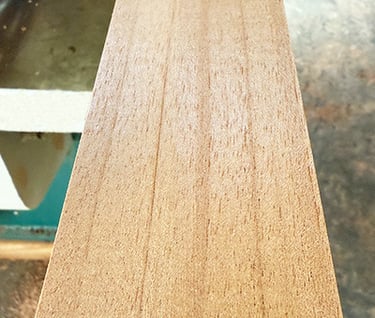
Step 2 - Straight Line the Pieces and Mill to Thickness
At Aegis Shutters, our commitment to superior craftsmanship continues with our meticulous wood inspection and milling process. Using precision machinery and traditional woodworking techniques, we ensure every board is cut perfectly straight and true, eliminating the warping and irregularities that can compromise both appearance and performance. Our quality control standards are uncompromising.
Our shutters are milled to a substantial 1 3/8 inch thickness, which is a full 1/4 inch thicker than most exterior shutters on the market today. This additional thickness isn't just about premium appearance – it translates directly into superior durability, enhanced weather resistance, and improved dimensional stability over time. The extra material provides greater structural integrity to withstand extreme weather conditions while maintaining the crisp, clean lines that define quality craftsmanship. This commitment to using thicker stock reflects our understanding that true value comes from building shutters that will perform beautifully for decades, not just meet minimum standards.
Step 3 - Plane and Sand Four Times
We plane and sand our shutter frames four times throughout the manufacturing process to achieve an unparalleled level of smoothness and precision that sets our shutters apart from mass-produced alternatives. Each progressive planing and sanding session removes increasingly finer imperfections, gradually refining the wood surface to eliminate any tool marks or grain inconsistencies that could affect the final finish quality. This methodical approach ensures that when your shutters receive their protective primer and paint, the surface is perfectly prepared to accept the finish evenly, resulting in a flawless appearance that enhances the natural beauty of the wood.
This process also significantly improves the longevity and performance of your shutters by creating surfaces that resist moisture penetration and weathering more effectively. The additional time and effort invested in this comprehensive preparation process translates directly into shutters that maintain their appearance longer and require less maintenance over their lifetime, representing the kind of attention to detail that defines our true craftsmanship.
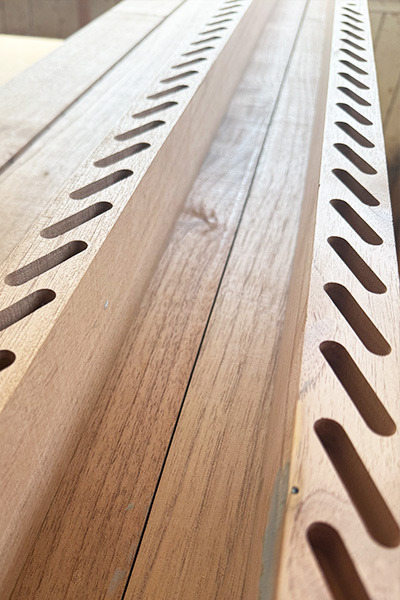
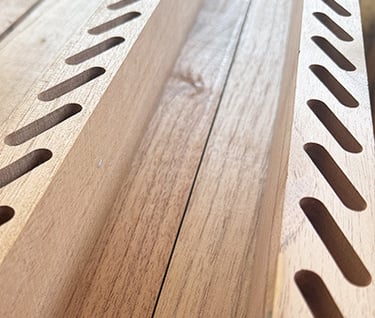
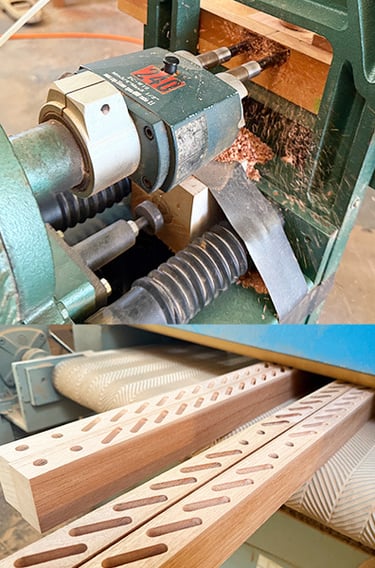
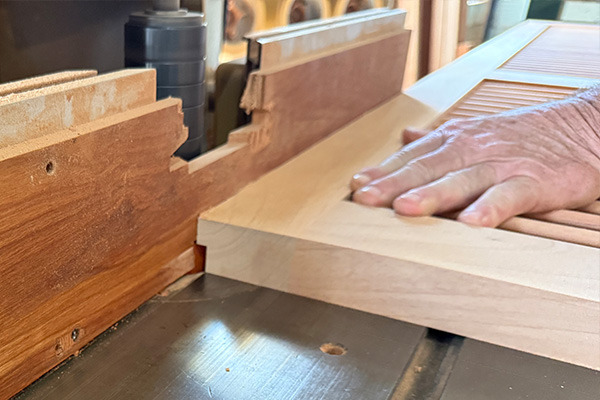
Step 4 - Louver Grooving (for louvered shutters)
Our precision louver grooving process utilizes specialized machinery to cut exact grooves into the shutter frames, ensuring each louver slot is positioned accuracy within 1 hundredth of an inch for perfect alignment and smooth operation. The grooves are cut to precise depths and widths that match our louver specifications, creating secure mounting points that eliminate the wobbling and misalignment common in lesser-quality shutters. Our extra-thick 1 3/8 inch frame stock provides significantly more material around each groove, which prevents weakening that can occur in thinner frames. This additional material creates a stronger foundation that resists splitting under stress, maintains tighter tolerances over time, and provides the structural stability necessary for shutters that will operate smoothly and maintain their precise fit for decades, even in challenging weather conditions.
Step 5 - Prep for Assembly
First, we bore the dowel holes using our precision boring machine that drills holes to a specific depth and diameter so that we can assemble each shutter frame using dowels that add additional strength to the overall structure. The professional grade wood glued dowels create strength in horizontal, vertical, and diagonal loads in order to withstand hurricane force winds and resists the sagging that you may see in exterior shutters of inferior quality.
Next, we run our frames through our sander another four times to ensure a smooth finish that the primer can easily bond to ensuring that the shutters are fully protected from the elements even in those hard to reach areas. After sanding each frame rail, we carefully vacuum out each hole to ensure a proper fit for the dowels and louvers.
Finally, we carefully inspect each louver once again to ensure that there is no warping or improper wood grains ensuring that each louver fits and aligns perfectly. Our attention to detail during the build process is reflected in the quality of our exterior shutters.

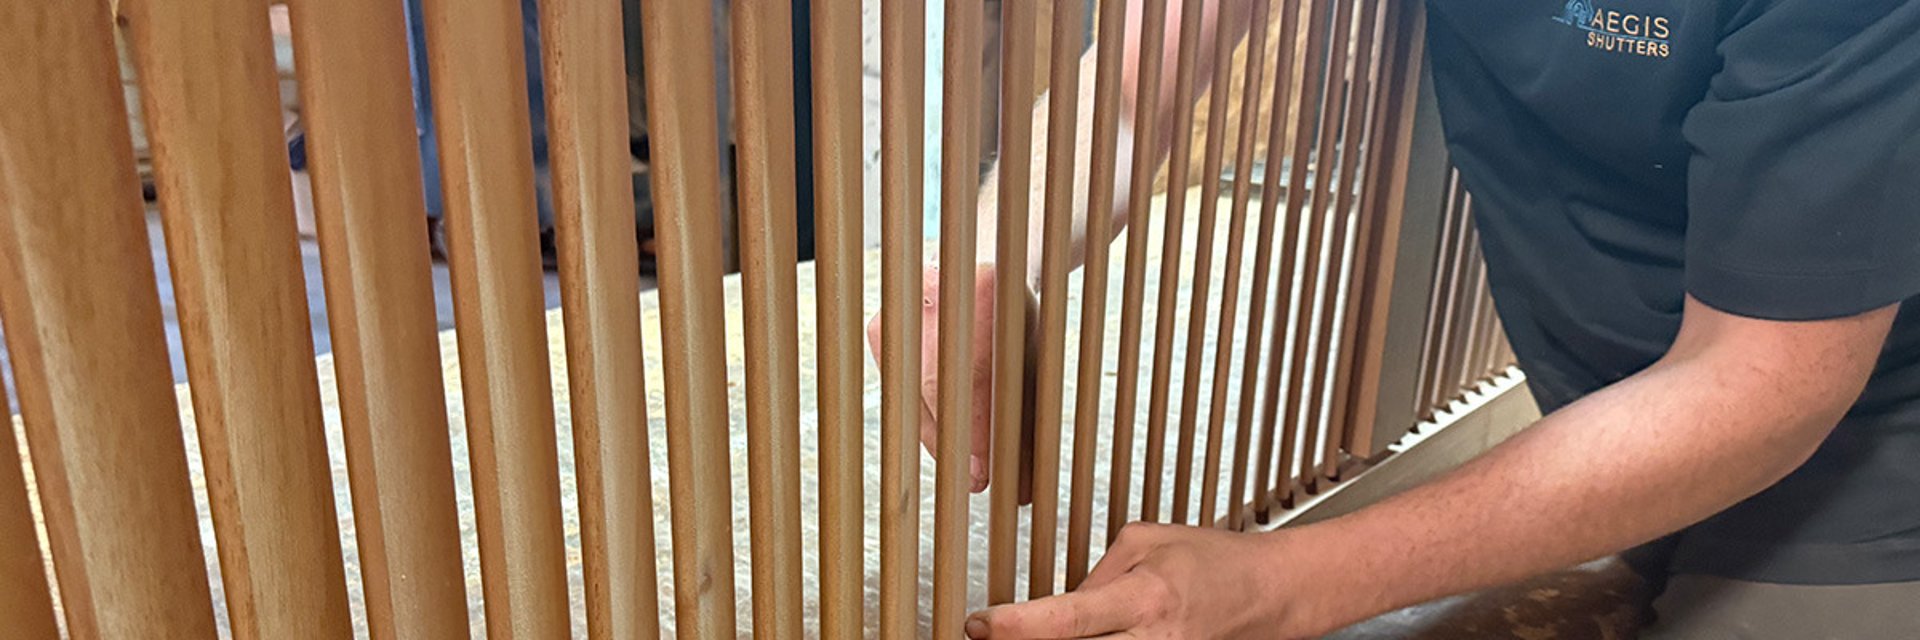
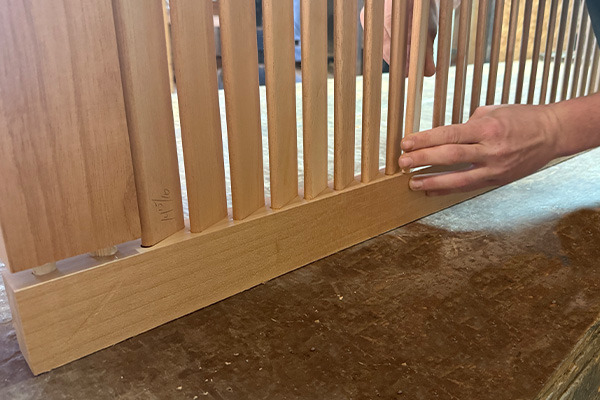
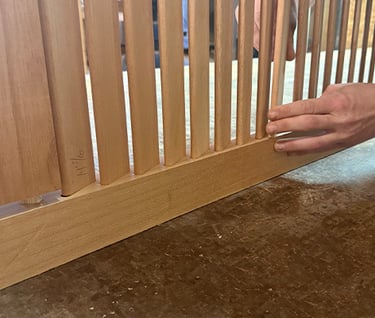
Step 6 - Shutter Assembly by Hand
At Aegis Shutters, each shutter is meticulously crafted by hand using time-honored joinery techniques that ensure maximum strength and longevity. Our skilled craftsmen carefully glue and dowel every frame joint, creating mechanical connections that far exceed the strength of simple butt joints or brad-fastened assemblies commonly found in mass-produced shutters. This traditional approach creates joints that are actually stronger than the surrounding wood, distributing stress evenly across the connection points and preventing the loosening, separation, or failure that can occur with lesser construction methods. The combination of hand-fitted joints, quality adhesives, and mechanical dowel reinforcement results in shutters built to withstand decades of weather exposure, thermal expansion and contraction, and operational use while maintaining their structural integrity and precise fit.
Once the shutter is assembled, it is clamped for a minimum of 4 hours, then left overnight for maximum drying time of the wood glue.
Step 7 - Final Sanding and Rabbeting
Now that the shutter is assembled and the glue if fully cured, we have one more opportunity to sand the wood before priming. We pass the shutters through the sander two more times per side, sand the edges, and knock off any sharp edges. These final sanding steps make sure that our primer adheres perfectly and evenly across the entire frame...including the edges!
For operational exterior shutters, we rabbet each edge. Rabbeting shutters creates overlapping joints along the meeting edges that distribute wind loads across both shutter panels rather than concentrating stress on a single closure point. This interlocking design significantly strengthens the closed shutter system by preventing individual panels from flexing independently and provides a unified structural response to severe weather conditions.
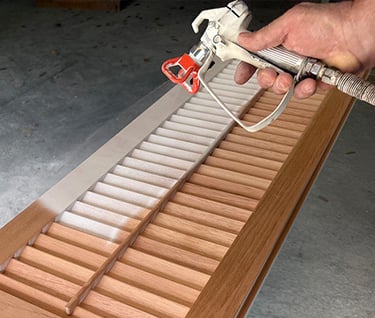
Step 8 - Prime with Oil Based Primer
At Aegis Shutters, we begin our finishing process with a high-quality oil-based, stain-blocking primer specifically formulated to work with Spanish cedar's unique characteristics. This premium primer penetrates deep into the wood grain to seal in the natural oils and that give Spanish cedar its natural rot resistance, preventing these oils from bleeding through the topcoat and causing discoloration or finish failure over time. The oil-based formulation creates an exceptional bond with the wood while providing superior moisture protection and ensuring optimal adhesion for the final paint system.
Following the primer application, each shutter receives meticulous hand sanding to create the perfect surface for the topcoat. Our craftsmen carefully sand every surface, paying special attention to raised grain areas and ensuring consistent smoothness across all frame components and louvers. This hand-sanding process removes any primer imperfections, creates the ideal surface texture for paint adhesion, and demonstrates our commitment to the kind of detailed preparation that separates custom-crafted shutters from factory-produced alternatives. The result is a flawlessly smooth foundation that allows our topcoat to achieve maximum durability and a beautiful, uniform finish.
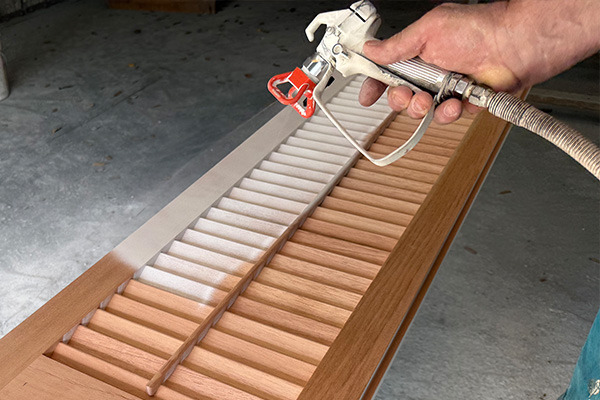
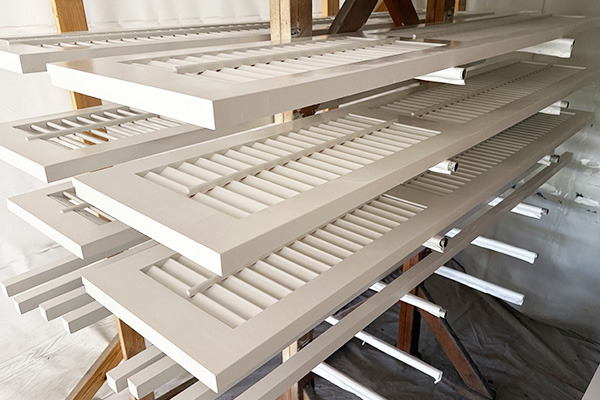
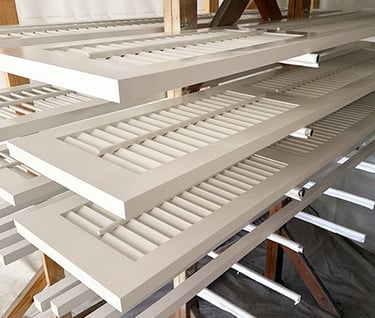
Step 9 - Painting, Drying, and Fully Curing
For our final coat, we apply Sherwin Williams Emerald line latex acrylic paint, recognized as one of the industry's highest-performing exterior finishes for its exceptional durability, fade resistance, and weather protection. This premium paint system provides superior color retention, flexibility to accommodate wood movement, and outstanding resistance to cracking, peeling, and chalking that can plague lesser-quality finishes. Our skilled craftsmen apply this topcoat with meticulous attention to detail, ensuring complete coverage and uniform thickness across every surface of the shutter, from the intricate louver edges to the broad frame faces.
After application, each painted shutter is carefully placed in our humidity-controlled drying room where temperature and moisture levels are precisely maintained to optimize the curing process. The shutters remain undisturbed for up to 48 hours during the initial drying phase, then are set aside for a full 30-day curing period that allows the paint film to achieve maximum hardness, adhesion, and chemical resistance. This extended curing time, far beyond what most manufacturers allow, ensures that when your shutters are installed, the finish has reached its full protective potential and will provide years of beautiful, low-maintenance service. This patient approach to the finishing process reflects our commitment to delivering shutters that perform as beautifully as they look.
At Aegis Shutters, we hand build your exterior shutters using the finest, most weather resilient Spanish Cedar to exact specifications to create a long lasting, exceptionally beautiful product that everyone can be proud of.
Aegis Shutters
Enduring Elegance Since 2000
Shutter Styles
© 2025. All rights reserved.
Call or Text at (504) 264-2999
555 Hass Rd
Pearl River, LA 70561
hello@aegisshutters.com